[2주차] - GitHub Actions CI/CD
CloudNet@ 가시다님이 진행하는 CI/CD 맛보기 스터디 내용 참고.
- https://docs.github.com/ko/actions : 공식 문서 , 개요 - Docs , 요금 - Docs
- GitHub Actions를 사용하여 리포지토리에서 바로 소프트웨어 개발 워크플로를 자동화, 사용자 지정 및 실행합니다.
- CI/CD를 포함하여 원하는 작업을 수행하기 위한 작업을 검색, 생성 및 공유하고 완전히 사용자 정의된 워크플로에서 작업을 결합할 수 있습니다.

- GitHub Actions 의 다양한 기능 활용하기 - Blog
- (정보 참고) Your first GitHub Actions workflow
- GitHub Actions is a computer that runs code on your behalf based on your repo-level workflow-definition file(s).
- (참고) nektos/act : Run your GitHub Actions locally - https://github.com/nektos/act
- The process for it is as follows:
- GitHub Actions is a computer that runs code on your behalf based on your repo-level workflow-definition file(s).
1. 프로젝트를 위한 GitHub.com 저장소를 생성하세요. : https://github.com/sspp30578/roadtok8s-py.git

2. 특정 파일 경로와 형식에 따라 저장소에 워크플로 정의 파일(또는 여러 파일)을 생성하세요. (자세한 내용은 곧 설명)
3. 워크플로 파일을 커밋하고 GitHub에 푸시하세요.
4. 워크플로 정의 파일에 따라 워크플로를 필요에 따라 수동으로 실행하거나 자동으로 실행되도록 설정하세요.
- 이제 Hello World 워크플로를 만들어 워크플로를 정의하고 실행하는 방법을 익혀봅시다.
- 2장에서 두 개의 GitHub 저장소를 생성했는데, 이 섹션에서는 road-tok8s-py 저장소(https://github.com/jmitchel3/roadtok8s-py)를 사용하겠습니다.
- Python 프로젝트의 루트에 .github/workflows/ 경로를 생성하세요.
- 이 경로는 GitHub Actions가 워크플로 정의 파일을 인식하는 데 필수적입니다.
- Git을 더 잘 다루는 사용자를 위해 덧붙이자면, 워크플로는 기본 브랜치(예: main 또는 master)에서만 작동하므로 반드시 기본 브랜치에서 이러한 폴더를 생성하세요.
mkdir -p .github/workflows/
touch .github/workflows/hello-world.yaml
- 워크 플로 파일 구성 : .github/work-flows/hello-world.yaml
- 워크플로의 이름
- 워크플로가 실행될 조건
- 실행할 단일 작업(워크플로는 여러 작업을 가질 수 있음)
- 사용할 운영 체제(Docker 컨테이너 이미지를 통해 설정)
- 작업 내에서 실행할 단계 또는 코드
- YAML 형식: 이 항목들을 YAML 형식으로 변환해야 합니다.
- GitHub Actions 워크플로는 YAML 형식을 요구하기 때문입니다.
- YAML은 구성 및 선언형 프로그래밍에서 일반적으로 사용되는 사람이 읽기 쉬운 데이터 직렬화 형식입니다.
- YAML은 매우 읽기 쉽기 때문에 빠르게 검토하기에 적합합니다. 다음 예제에서 이를 확인할 수 있습니다.
- 예제 4.1: YAML 기본 구조
name: Hello World
items:
  sub-item:
    name: Hello
    description: world
  sub-list:
    - element a
    - element b
other-list: [1, 2, 3]- 예제 4.2는 GitHub Actions 워크플로가 이해할 수 있는 YAML 형식의 파일입니다.
- GitHub Actions는 선언형 프로그래밍의 한 예로, 어떻게 실행되는지에 관계없이 원하는 작업을 선언합니다.
- 예제 4.2: GitHub Actions로 Hello World - code
name: Hello World    # Github 웹 사이드바 이름
on:
  workflow_dispatch:
  push:

jobs:
  build:             # Jobs 이름
    runs-on: ubuntu-latest
    steps:
      - uses: actions/checkout@v3
      - name: Hello World         # Step 이름
        run: echo "Hello World"

- on: push : 저장소에 코드 푸시할 때 마다 워크플로 실행, scope 범위 설정 가능
- on: workflow_dispatch : 깃헙 웹 페이지에서 수동으로 워크플로 실행 가능

- runs-on: ubuntu-latest : ubuntu 가 가장 유연한 러너 - Docs , Images
- GitHub은 워크플로를 실행할 수 있는 호스팅된 가상 머신을 제공합니다.
- 이 가상 머신에는 GitHub Actions에서 사용할 수 있는 도구, 패키지, 설정 등의 환경이 포함되어 있습니다. .
- steps : 실행하고자 하는 스텝, 코드 정의
- uses : 사용하려는 액션 이름, 위에서는 내장된 액션으로 코드 체크아웃, 거의 모든 워크플로에 필수적인 단계.
- name : 각 스텝의 이름(옵션)
- run : 명령 실행, (예. echo “my text”, “python3 my_script.py)
- 이 파일을 로컬에서 생성한 후, 아래 명령어를 사용하여 파일을 GitHub에 commit하고 push하세요
git add .github/workflows/hello-world.yaml
git commit -m "Create hello-world.yaml workflow"
git push origin main
- . 사이드바 이름(Hello World 확인), 커밋 내용

- Job 이름, use 스텝 확인, run 스텝 이름과 실행 확인

⇒ 방금 서버리스 CI/CD 파이프라인을 사용하여 대신 코드를 실행했습니다.
(추가) env 찍어보기
name: Hello World
on:
  workflow_dispatch:
  push:

jobs:
  build:
    runs-on: ubuntu-latest
    steps:
      - uses: actions/checkout@v3
      - name: Print Env
        run: env
실습환경
aws cloudformation 배포 : EC2 1대 - 보안 그룹(tcp 22,80 any IPv4 허용)

1. 직접 개발 후 실행
☞ 서버 - Github : 직접 개발 후 서버 실행 → 코드 수정 후 재실행
1. AWS EC2 접속 후 아래 작업 : ssh ubuntu@<EC2 Public IP>
#
python3 -V

#
cat > server.py <<EOF
from http.server import ThreadingHTTPServer, BaseHTTPRequestHandler
from datetime import datetime

class RequestHandler(BaseHTTPRequestHandler):
    def do_GET(self):
        self.send_response(200)
        self.send_header('Content-type', 'text/plain')
        self.end_headers()
        now = datetime.now()
        response_string = now.strftime("The time is %-I:%M:%S %p, CloudNeta Study.\n")
        self.wfile.write(bytes(response_string, "utf-8"))

def startServer():
    try:
        server = ThreadingHTTPServer(('', 80), RequestHandler)
        print("Listening on " + ":".join(map(str, server.server_address)))
        server.serve_forever()
    except KeyboardInterrupt:
        server.shutdown()

if __name__== "__main__":
    startServer()
EOF

#
sudo python3 server.py
## 아래 확인 후
CTRL+C 로 실행 취소

# (신규터미널) 서버1 SSH 접속
curl localhost
sudo ss -tnlp
State        Recv-Q       Send-Q             Local Address:Port              Peer Address:Port       Process
LISTEN       0            5                        0.0.0.0:80                     0.0.0.0:*           users:(("python3",pid=3065,fd=3))

2. Git 작업
- 토큰 발급해두기 : scopes(repo, workflow) 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

- Private Repo 신규 생성

- 서버 1에서 직접 Git 작업
#
GITUSER=<>
GITUSER=****30578

git clone https://github.com/$GITUSER/cicd-2w.git
tree cicd-2w/
cp server.py cicd-2w/
cd cicd-2w/

#
git status
git add .
git commit -m "first commit"
git push origin main
Username for 'https://github.com': <>
Password for 'https://gasida@github.com': <>

- 서버 실행
#
nohup sudo python3 server.py > server.log 2>&1 &
cat server.log
curl localhost
cat server.log

#
grep log .gitignore
*.log

#
git add .
git commit -m "add log file"
git status


3. 코드 수정 후 재실행
#
sed -i "s/CloudNeta/CICD/g" server.py

# 프로세스 종료
sudo ss -tnlp
sudo fuser -k -n tcp 80
sudo ss -tnlp

# 재실행
nohup sudo python3 server.py > server.log 2>&1 &
curl localhost
4. 코드 push ⇒ 장점과 단점?
#
git config --global user.name ***3078
git config --global user.email ***30578@gmail.com
git config --global credential.helper store
#
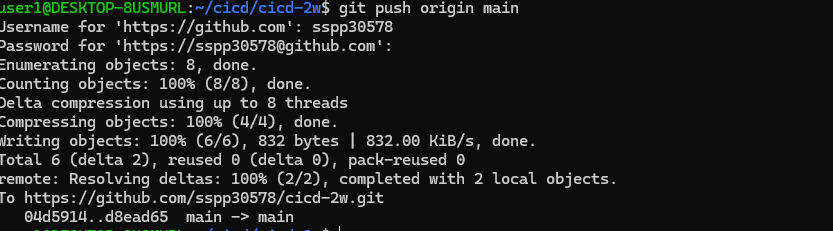
git add . && git commit -m "version update" && git push origin main
Username for 'https://github.com': <>
Password for 'https://gasida@github.com': <>
#
git push origin main
2. GitHub Actions -1-
☞ 서버 - Github/Actions - myPC : GitHub Actions 으로 CI/CD 자동화 작업 실행
1. GIt : SSH_PRIVATE_KEY , EC2_PIP
- 2개의 값(IP, ssh key) 사용되면, 이 값은 절대 Github Actions 이나 Git Repo 에 노출되면 안되니 secret 사용함
2. 코드 작업
- 자신의 PC에서 아래 작업
#
git clone https://github.com/***30578/cicd-2w.git
cd cicd-2w

#
mkdir -p .github/workflows/
touch .github/workflows/deploy.yaml

sed -i -e "s/CICD/CICD 2w/g" server.py- .github/workflows/deploy.yaml
name: CICD1
on:
  workflow_dispatch:
  push:
    branches:
      - main

jobs:
  deploy:
    runs-on: ubuntu-latest
    steps:
      - name: Configure the SSH Private Key Secret
        run: |
          mkdir -p ~/.ssh/
          echo "${{ secrets.SSH_PRIVATE_KEY }}" > ~/.ssh/id_rsa
          chmod 600 ~/.ssh/id_rsa

      - name: Set Strict Host Key Checking
        run: echo "StrictHostKeyChecking=no" > ~/.ssh/config

      - name: Git Pull
        run: |
          export MY_HOST="${{ secrets.EC2_PIP }}"
          ssh ubuntu@$MY_HOST << EOF
            cd /home/ubuntu/cicd-2w || exit 1
            git pull origin main || exit 1
          EOF

      - name: Run service
        run: |
          export MY_HOST="${{ secrets.EC2_PIP }}"
          ssh ubuntu@$MY_HOST sudo fuser -k -n tcp 80 || true
          ssh ubuntu@$MY_HOST "nohup sudo -E python3 /home/ubuntu/cicd-2w/server.py > /home/ubuntu/cicd-2w/server.log 2>&1 &"
3. Git push
git add . && git commit -m "add workflow" && git push origin main

# [서버1]
cd cicd-2w/
grep -i cicd server.py
sudo ps -ef |grep server.py
tail /home/ubuntu/cicd-2w/server.log
4. 코드 수정 후 동작 확인
sed -i -e "s/CICD 2w/CICD1 End/g" server.pyname: CICD1 End
on:
workflow_dispatch:
push:
branches:
- main
jobs:
deployfinal:
runs-on: ubuntu-latest
steps:
- name: Configure the SSH Private Key Secret
run: |
mkdir -p ~/.ssh/
echo "${{ secrets.SSH_PRIVATE_KEY }}" > ~/.ssh/id_rsa
chmod 600 ~/.ssh/id_rsa
- name: Set Strict Host Key Checking
run: echo "StrictHostKeyChecking=no" > ~/.ssh/config
- name: Git Pull
run: |
export MY_HOST="${{ secrets.EC2_PIP }}"
ssh ubuntu@$MY_HOST << EOF
cd /home/ubuntu/cicd-2w || exit 1
git pull origin main || exit 1
EOF
- name: Run service
run: |
export MY_HOST="${{ secrets.EC2_PIP }}"
ssh ubuntu@$MY_HOST sudo fuser -k -n tcp 80 || true
ssh ubuntu@$MY_HOST "nohup sudo -E python3 /home/ubuntu/cicd-2w/server.py > /home/ubuntu/cicd-2w/server.log 2>&1 &"#
git add . && git commit -m "edit workflow" && git push origin main
# [서버1]
grep -i cicd server.py
sudo ps -ef |grep server.py
tail /home/ubuntu/cicd-2w/server.log
3. GitHub Actions -2-
☞ 서버 - Github/Actions - myPC : GitHub Actions 에서 ‘코드 - 빌드 - 테스트’ 후 대상 서버에 전달 후 실행
- 목표
- GitHub Actions에서 코드 가져오기
- GitHub Actions에서 .gitignore 제외된 민감 파일 내용을 을 안전하게 가져와서 사용하기 ⇒ 매번 수동으로 가져오기 불편하다!
- scp로 대상 서버 ec2 에 py 파일 전송
- 대상 서버 ec2에 기존 서비스 중지하고 다시 실행
- GitHub Actions 파이썬 버전 확인
name: CICD2
on:
  workflow_dispatch:
  push:
    branches:
      - main

jobs:
  deployfinal:
    runs-on: ubuntu-latest
    steps:
      - name: Test
        run: |
          python -V || true
          python3 -V || true
          which python || true
          which python3 || true
          env
git add . && git commit -m "echo env" && git push origin mainPython 3.10.12
Python 3.10.12
/usr/bin/python
/usr/bin/python3
- GitHub Actions에서 .gitignore 제외된 민감 파일 내용을 을 안전하게 가져와서 사용하기 ⇒ 매번 수동으로 가져오기 불편하다!
- .gitignore 제외된 민감 파일 내용 사용
#
grep env .gitignore

#
cat > .env <<EOF
ACCESSKEY : 1234
SECRETKEY : 5678
EOF

#
git add .env
git status
rm -f .env
- Secret 생성 : MYKEYS ⇒ 아래 SSH for GitHub Actions 에서 env 전달 방식 활용
ACCESSKEY : asdf1234
SECRETKEY : qwer1234
- GitHub Actions 마켓플레이스: 작업을 간소화하고 프로세스를 자동화하기 위해 워크플로를 확장하세요.
- https://github.com/marketplace
- ssh, scp 검색 → aws 검색
- SSH for GitHub Actions - Github , marketplace

예제
name: remote ssh command
on: [push]
jobs:
  build:
    name: Build
    runs-on: ubuntu-latest
    steps:
      - name: executing remote ssh commands using password
        uses: appleboy/ssh-action@v1.2.0
        with:
          host: ${{ secrets.HOST }}
          username: linuxserver.io
          password: ${{ secrets.PASSWORD }}
          port: ${{ secrets.PORT }}
          script: whoami
# Using private key
- name: executing remote ssh commands using ssh key
uses: appleboy/ssh-action@v1.2.0
with:
host: ${{ secrets.HOST }}
username: ${{ secrets.USERNAME }}
key: ${{ secrets.KEY }}
port: ${{ secrets.PORT }}
script: whoami# Multiple Commands
- name: multiple command
uses: appleboy/ssh-action@v1.2.0
with:
host: ${{ secrets.HOST }}
username: ${{ secrets.USERNAME }}
key: ${{ secrets.KEY }}
port: ${{ secrets.PORT }}
script: |
whoami
ls -al# Pass environment variable to shell script
- name: pass environment
uses: appleboy/ssh-action@v1.2.0
+ env:
+ FOO: "BAR"
+ BAR: "FOO"
+ SHA: ${{ github.sha }}
with:
host: ${{ secrets.HOST }}
username: ${{ secrets.USERNAME }}
key: ${{ secrets.KEY }}
port: ${{ secrets.PORT }}
+ envs: FOO,BAR,SHA
script: |
echo "I am $FOO"
echo "I am $BAR"
echo "sha: $SHA"- 워크플로 설정 후 테스트
- 코드 작업: github action 이 실행 될때 생성되는 runner에 marketplace 에 있는 것을 사용 하여 적용
name: CICD2
on:
  workflow_dispatch:
  push:
    branches:
      - main

jobs:
  ssh-deploy:
    runs-on: ubuntu-latest
    steps:
      - name: Github Repository Checkout
        uses: actions/checkout@v4

      - name: executing remote ssh commands
        uses: appleboy/ssh-action@v1.2.0
        env:
          AWS_KEYS: ${{ secrets.MYKEYS }}
        with:
          host: ${{ secrets.EC2_PIP }}
          username: ubuntu
          key: ${{ secrets.SSH_PRIVATE_KEY }}
          envs: AWS_KEYS
          script_stop: true
          script: |
             cd /home/ubuntu/cicd-2w
             echo "$AWS_KEYS" > .env
- 최종 : github action 에서 코드 가져오고 변경된 py 파일을 전송 후 기존 서비스 중지 후 재기동
- server.py 수정 해두기
response_string = now.strftime("The time is %-I:%M:%S %p, CICD2 End\n")- 또한 github repo 에서는 없음을 확인

- .env 파일 내용 업데이트 방법 : 조금 불편하지만, Github Secret 를 직접 업데이트 후 트리거 하자
ACCESSKEY : asdf1234end
SECRETKEY : qwer1234end
- scp : GitHub Action that copy files and artifacts via SSH - Github , marketplace
- server.py 수정 해두기
response_string = now.strftime("The time is %-I:%M:%S %p, SCP Test\n")- 수정
name: CICD2
on:
  workflow_dispatch:
  push:
    branches:
      - main

jobs:
  scp-ssh-deploy:
    runs-on: ubuntu-latest
    steps:
      - name: Github Repository Checkout
        uses: actions/checkout@v4

      - name: executing remote ssh commands
        uses: appleboy/ssh-action@v1.2.0
        env:
          AWS_KEYS: ${{ secrets.MYKEYS }}
        with:
          host: ${{ secrets.EC2_PIP }}
          username: ubuntu
          key: ${{ secrets.SSH_PRIVATE_KEY }}
          envs: AWS_KEYS
          script_stop: true
          script: |
             cd /home/ubuntu/cicd-2w
             echo "$AWS_KEYS" > .env
             sudo fuser -k -n tcp 80 || true

      - name: copy file via ssh
        uses: appleboy/scp-action@v0.1.7
        with:
          host: ${{ secrets.EC2_PIP }}
          username: ubuntu
          key: ${{ secrets.SSH_PRIVATE_KEY }}
          source: server.py
target: /home/ubuntu/cicd-2w- 확인
# 서버 1
ls -al ~/cicd-2w/
cat ~/cicd-2w/server.py | grep SCP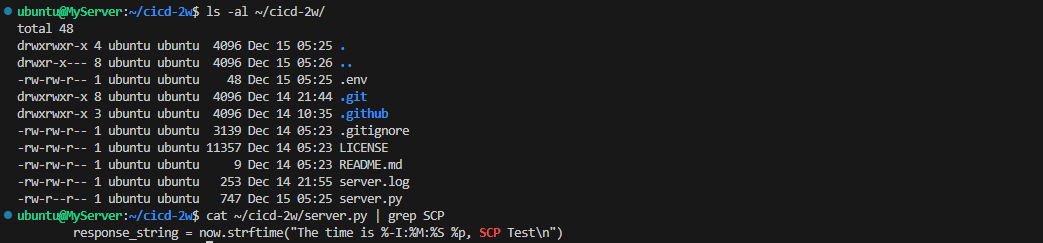
- 최종 : github action 에서 코드 가져오고 변경된 py 파일을 전송 후 기존 서비스 중지 후 재기동
- server.py 수정 해두기
response_string = now.strftime("The time is %-I:%M:%S %p, CICD2 End\n")
- 수정
name: CICD2
on:
  workflow_dispatch:
  push:
    branches:
      - main

jobs:
  deploy:
    runs-on: ubuntu-latest
    steps:
      - name: Github Repository Checkout
        uses: actions/checkout@v4

      - name: copy file via ssh
        uses: appleboy/scp-action@v0.1.7
        with:
          host: ${{ secrets.EC2_PIP }}
          username: ubuntu
          key: ${{ secrets.SSH_PRIVATE_KEY }}
          source: server.py
          target: /home/ubuntu

      - name: executing remote ssh commands
        uses: appleboy/ssh-action@v1.2.0
        env:
          AWS_KEYS: ${{ secrets.MYKEYS }}
        with:
          host: ${{ secrets.EC2_PIP }}
          username: ubuntu
          key: ${{ secrets.SSH_PRIVATE_KEY }}
          envs: AWS_KEYS
          script_stop: true
          script: |
             cd /home/ubuntu/cicd-2w
             echo "$AWS_KEYS" > .env
             sudo fuser -k -n tcp 80 || true
             rm server.py
             cp /home/ubuntu/server.py ./
             nohup sudo -E python3 /home/ubuntu/cicd-2w/server.py > /home/ubuntu/cicd-2w/server.log 2>&1 &
             echo "test" >> /home/ubuntu/text.txt
git add . && git commit -m "Deploy CICD2 Final" && git push origin main- 웹 접속 확인

- 코드 수정 후 다시 한번 더 확인 : text.txt 파일의 바라는 목적은 test 내용 1줄임
# 서버1
cat /home/ubuntu/text.txt

# 트러거 후 다시 확인
cat /home/ubuntu/text.txt

실행할때마다 계속 추가되므로 ansible 같은 선언형 툴이 필요함
4. GitHub Actions with Ansible
Ansible
name: Run Ansible
on:
workflow_dispatch:
push:
branches:
- main
jobs:
run-playbooks:
runs-on: ubuntu-latest
steps:
- name: Github Repository Checkout
uses: actions/checkout@v4
- name: Setup Python 3
uses: actions/setup-python@v5
with:
python-version: "3.8"
- name: Upgrade Pip & Install Ansible
run: |
python -m pip install --upgrade pip
python -m pip install ansible
- name: Implement the Private SSH Key
run: |
mkdir -p ~/.ssh/
echo "${{ secrets.SSH_PRIVATE_KEY }}" > ~/.ssh/id_rsa
chmod 600 ~/.ssh/id_rsa
- name: Ansible Inventory File for Remote host
run: |
mkdir -p ./devops/ansible/
export INVENTORY_FILE=./devops/ansible/inventory.ini
echo "[my_host_group]" > $INVENTORY_FILE
echo "${{ secrets.EC2_PIP }}" >> $INVENTORY_FILE
- name: Ansible Default Configuration File
run: |
mkdir -p ./devops/ansible/
cat <<EOF > ./devops/ansible/ansible.cfg
[defaults]
ansible_python_interpreter = '/usr/bin/python3'
ansible_ssh_private_key_file = ~/.ssh/id_rsa
remote_user = ubuntu
inventory = ./inventory.ini
host_key_checking = False
EOF
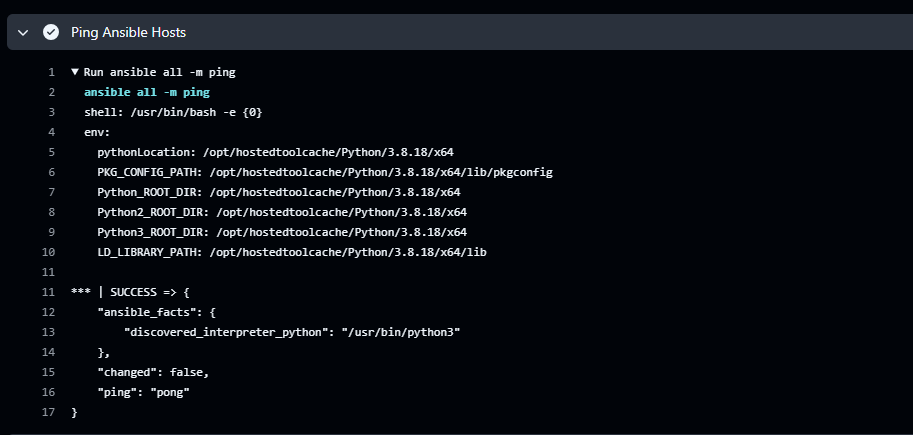
- name: Ping Ansible Hosts
working-directory: ./devops/ansible/
run: |
ansible all -m ping
# - name: Run Ansible Playbooks
# working-directory: ./devops/ansible/
# run: |
# ansible-playbook install-nginx.yaml
# - name: Deploy Python via Ansible
# working-directory: ./devops/ansible/
# run: |
# ansible-playbook deploy-python.yamlgit add . && git commit -m "Deploy Ansible Test" && git push origin main
실습 후 자원 삭제
- AWS CloudFormation Stack 삭제
- GitHub Repo 삭제